How To Change Screen Resolution In Ubuntu:- Ubuntu is one of the major distribution which is used, but one should have knowledge of linux commands and its reference for using it. So today in this article i am going to tell you about the changing screen resolution in Ubuntu 13.10 (Saucy Salamdar).
How To Change Screen Resolution In Ubuntu
Normally, in ubuntu you can get the resolution option upto 1024×768 which is default resolution, but if you want desired resolution on Ubuntu operating system then you have to tweak, mean to say modify some configuration with the help of some commands. If you are having a video card (ATI or Nvidia) then go for proprietary drivers.
Commands can solely add the new resolution in Ubuntu monitor settings, but for fixing it permanently we have to tweak xorg.conf. by default the xorg.conf file is not present, so here we will create it manually. so let’s follow the procedure and get a desired resolution in ubuntu 13.10
Note:-Before start applying the following procedure you should know about the resolution setings for your monitor.
Requirement
* Terminal (Already present in Ubuntu)
* Text Editor ()
How To Change Screen Resolution In Ubuntu : Steps
Step 1
First of all open the terminal (you will find it in top launcher menu, just search there with the word “Terminal”)
Step 2
Now type the following command for set up the screen resolution size with frequency (you should know about the proper resolution setting of your monitor here i am using 1280×1024 with 60 Hz).
# sudo cvt 1280 1024 60
step 3
After that add the new mode in which you have to copy the previous command output (which is in inverted comma) and append at the end with the below given command.
# sudo xrandr –newmode “1024x768_60.00″ 63.50 1280 1024 1072 1176 1328 1024 768 771 775 798 -hsync +vsync
Step 4
After adding the newmode it’s time to use it in resolution setting so use the following command and press enter
xrandr –addmode DVI-0 “1280x1024_60.00″
In place of 1280×1024 use your desired resolution which you have set in first step using cvt command, the above given resolution is for demo purpose. Apart from this check the connected mode of your monitor using xrandr command, mine is DVI-0, check your’s and apply it in above command.
Step 5
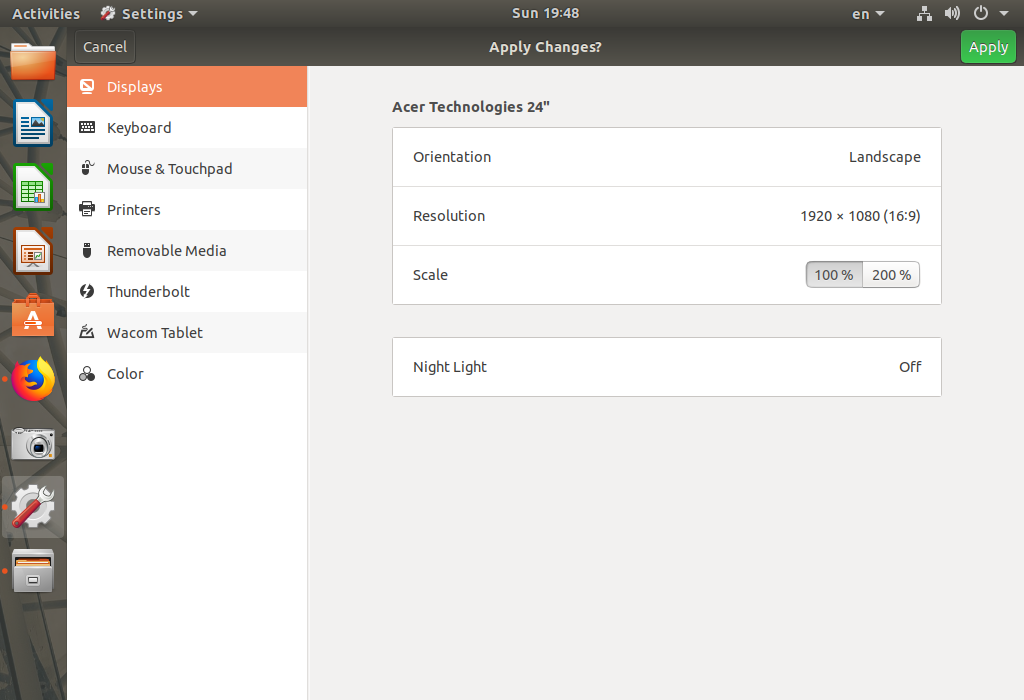
That’s it you have added a new screen resolution to your monitor setting just go to the display setting and change it, but remember it will get back to it’s native resolution after a reboot.
Step 6
Now it’s time to fix the resolution permanently, so for that you have to create a file in /etc/X11/xorg.conf (for creating file follow the below command)
#sudo nano xorg.conf
Now paste the following code in that file and save it using ctrl+o, that’s it.
- Section “Device” Identifier “Configured Video Device” EndSection Section “Monitor” Identifier “Configured Monitor” EndSection Section “Screen” Identifier “Default Screen” Monitor “Configured Monitor” Device “Configured Video Device” EndSection
step 7
Finally just run the command for reconfiguration of xorg-xserver.
#sudo dpkg-reconfigure xorg-xserver.
So this is the step by step tutorial for set up desired or change screen resolution in ubuntu.


Leave a Comment
You must be logged in to post a comment.